Hi, friends! Today, I’ll guide you through the entire process of setting up a Minecraft server on Hostinger. We’ll cover each step to get your server ready for play as quickly as possible. Let’s get started!
What is Hostinger?
Hostinger is a web hosting company that provides website hosting, virtual private servers (VPS), and domain registration services. It was founded in 2004 and offers various hosting plans that are suitable for both small websites and large projects. Hostinger is known for its affordable prices and high server performance.
Hostinger’s main services include:
- Web Hosting: Various hosting plans for websites.
- VPS hosting: Virtual private servers with flexible settings and high performance.
- Domain Registration: Ability to register a domain name for your website.
- Website Builder: Tools to create websites without the need to know programming.
- Hostinger also offers 24/7 technical support, making it convenient for users who need help managing their sites and servers.
Hostinger also offers game server hosting, including servers for popular games such as Minecraft. Hostinger’s game servers provide high performance, low latency, and various customizations to control gameplay. Here are some of the features of Hostinger game servers:
- High performance: Utilizing state-of-the-art server technology and hardware to ensure smooth gameplay.
- Ease of use: Intuitive control panels for server configuration and management.
- Scalability: Ability to increase server resources as needed.
- Security: Regular backups and protection against DDoS attacks.
- Technical support: Round-the-clock assistance in solving any server-related issues.
These features make Hostinger an attractive option for those who want to run and manage game servers, such as Minecraft servers, with minimal effort and cost.
In this video you will see how to register and pay for hosting on Hostinger:
Changing the version of minecraft to yours!
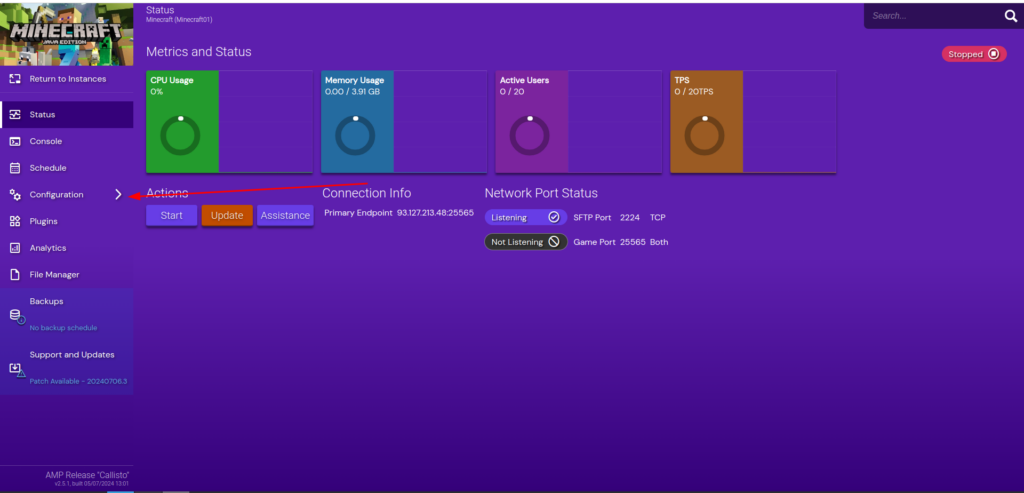
1. Go to the configuration.
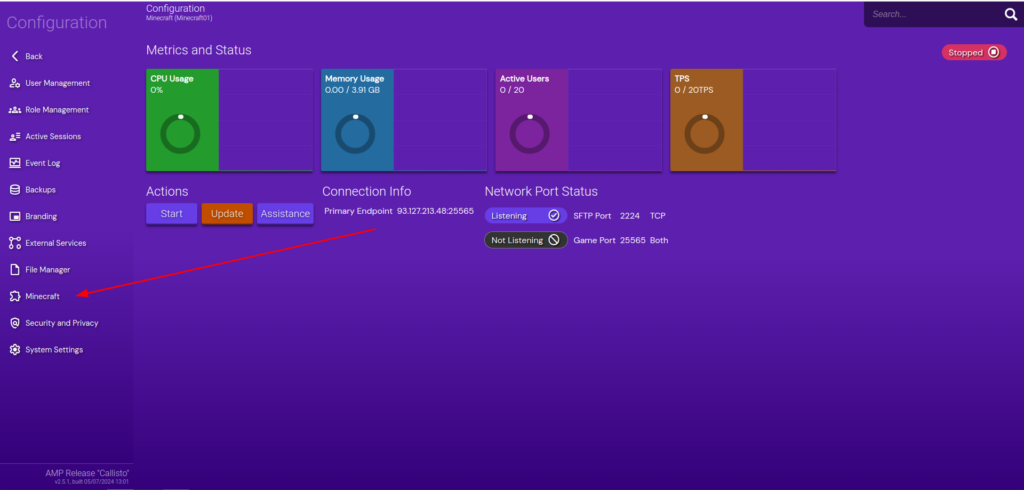
2. Go to Minecraft.
3. Go to the “Server and Startup” section.
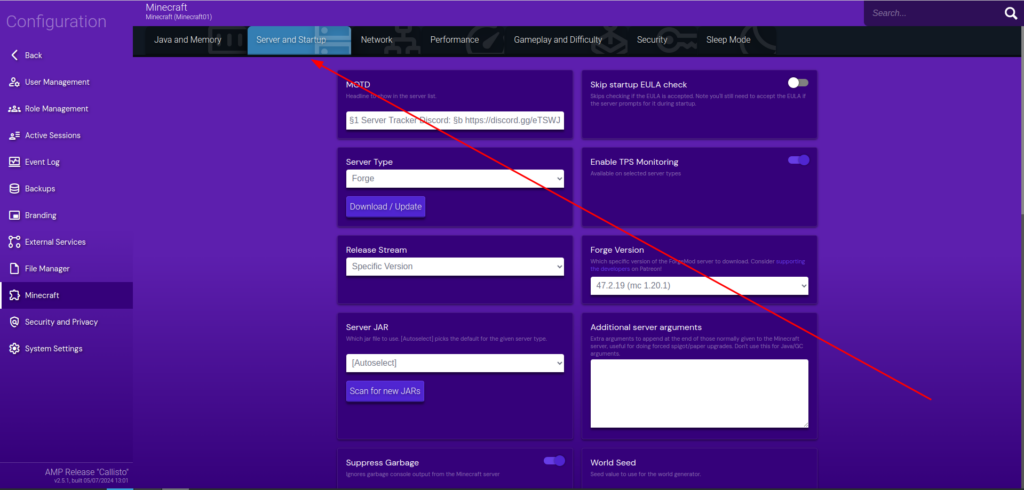
4. Select the server core and its version, then click “Download/Update”. The core is labeled as “Server Type” and the version as “Version”. Make sure that the Minecraft versions match between you and the players, otherwise, they won’t be able to connect to your server.
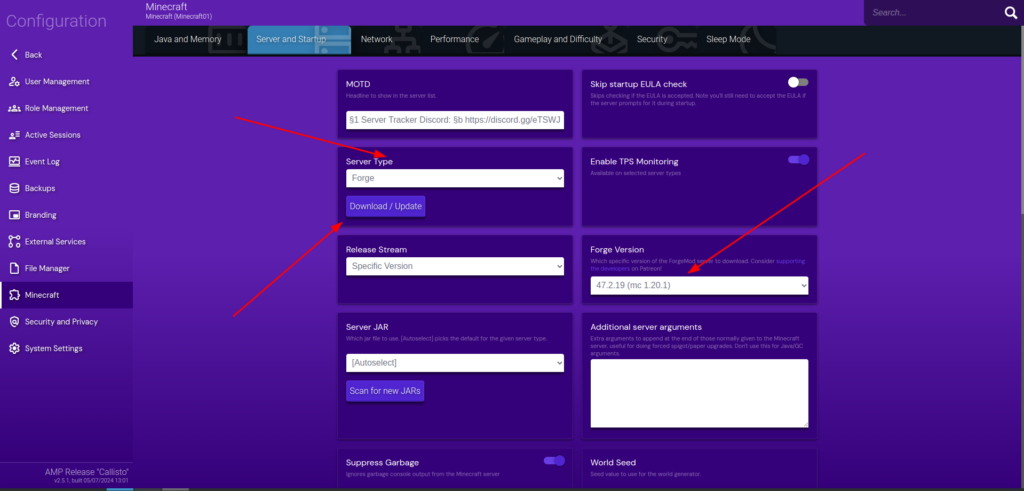
Changing the Server Description
1. Find the “MOTD” field at the top of the server window.

2. Enter the text you want players to see.
How to Change Text Color and Make It More Attractive
Use the following codes to change the text color:
- §0 – Black
- §1 – Dark Blue
- §2 – Dark Green
- §3 – Dark Aqua
- §4 – Dark Red
- §5 – Dark Purple
- §6 – Gold
- §7 – Gray
- §8 – Dark Gray
- §9 – Blue
- §a – Green
- §b – Aqua
- §c – Red
- §d – Light Purple
- §e – Yellow
- §f – White
Example:
§1 My server

Allocating Memory for the Server
1. When purchasing the server, you selected how much RAM will be available.
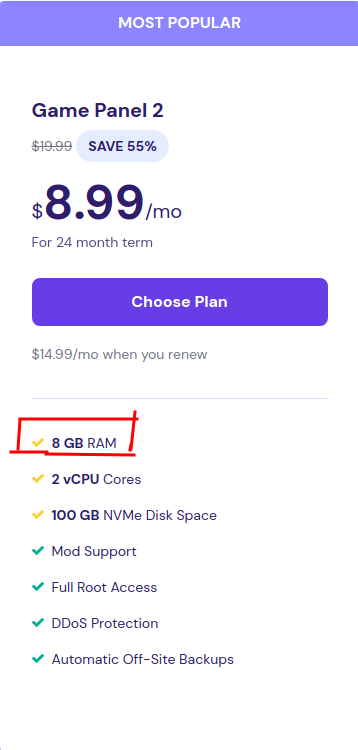
2. Go to the “Java and Memory” section.

3. In the “Memory Limit” field, set half of the total RAM. For example, if you have 8 GB, set it to 4 GB
(1 GB = 1000 MB).
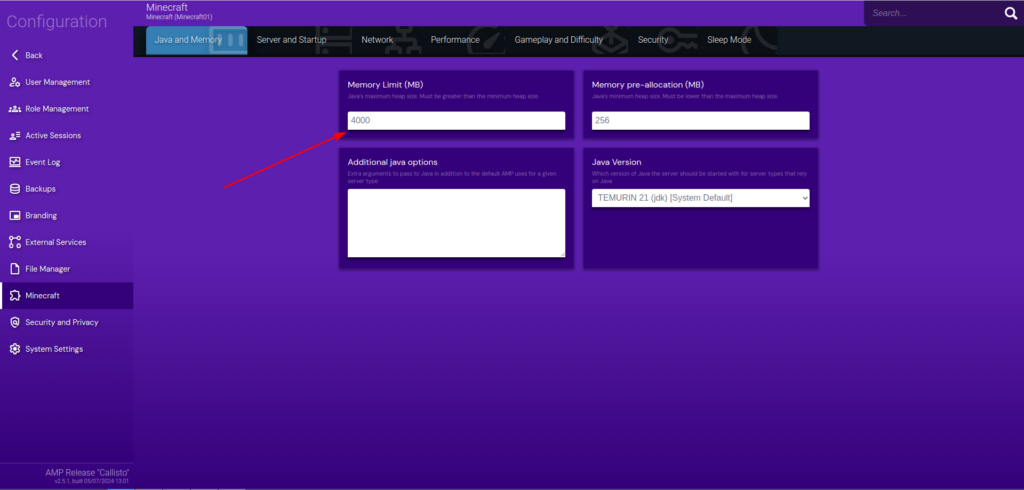
Now you have 4 GB of RAM allocated for your server!
How to Change Your Minecraft Server Icon
2. Connect to your server using FileZilla.
Detailed instructions on how to connect can be found in this article: [Link to article].
3. Rename your image to server-icon.png and replace the current server icon.
Make sure your image is 64×64 pixels and in PNG format.
You have successfully changed your server icon!
Today We Set Up Our Minecraft Server on Hostinger
Today, we went through all the steps to set up our very own Minecraft server on Hostinger. Here’s a quick recap of what we did:
- Choosing the Server Core and Version: We selected the appropriate core and Minecraft version for our server.
- Changing the Server Description (MOTD): We customized the text that players see when they connect to the server and learned how to add colors and styles.
- Allocating Memory: We determined the optimal amount of RAM for our server to ensure smooth performance.
- Replacing the Server Icon: We set a new icon for our server to make it more attractive and recognizable.
Now our server is fully set up and ready for us to enjoy with friends!